by Artinspireblog | May 9, 2015 | Basic Learning, Photoshop Tutorials, tips & tricks, Tutorials
Disclaimer: This post contains affiliate links! I only share the products that I love and use and I may mention them in my post.
I struggled for a while really when the need to convert drawing to digital format arose. Being an Artist, it is really getting essential to get ourselves and our art online and sometimes really important to create vector files that are scale-able.
When I started workinig digitally, i right away started with working directly through illustrator and Learned the Basics of Vector to get started. If you have a blog or shop or website where you would like to sell your digital artworks ( Read my post on How to sell art online here ) or maybe just plainly want to transfer your work into digital format to color it digitally , first thing first , you need to get it into a line work that is digitally supported.
For digital Artwork , or maybe coloring pages you need to have a clean and crisp black and white line. Here is a little tutorial for really novice artists who would like to do that.

1-Draw Clean and Bold
Draw with pencil or directly whatever is comfortable for you , keeping in mind that what you are drawing will be scanned and digitally modified and manipulated. More crisp and clean line you have easier it becomes to convert drawing to digital format.
I like to start my drawing with pencil , once I am done with the basic idea , I like to switch directly to a black Fine tipped marker to fill in the details. As I don’t like to rework on my details 🙂 . So it is totally up to you how you draw but the lines must be Clean and Bold .
The tools I use for drawing are
Fine Tipped Black PenRegular Sketch Book I use this oneThe Printer / Scanner that I use

2-Importance of Right Tools
Nothing can be worst than finishing your pre sketch with pencil and when you start drawing you realize that your sharpie or marker is out of ink!.
Make sure that you have a well-filled marker that gives clean edges. Rough edges means MORE touching up after the artwork is digitally altered.
3- Scan high res
I like to scan my artwork on high resolution , you can ALWAYS go down but you cant go up and scale a pixel image . Also i like to keep my scanner settings to colored and NOT BLACK AND WHITE. Black and white scans give a line contrast that is too much to handle and doesn’t give a smooth line in a final black and white image.
4-Adjust Curves and Brightness.
Finally in Photoshop you can adjust the Curves and play around with the brightness and contrast to get a clean and crisp image quality.


5-Vactorize!
Last but not the least , you can copy your final clean image Ctrl+A (select all) and place Ctrl+V (Paste) into illustrator and then trace it !

Result is a clean crisp outline that you can scale to any size you like WITHOUT LOOSING its line quality. Some additional steps you might want to take after the vactorization step is complete is to convert it to outline and clean the white area . I have explained cleaning the outlines in another post that you can Read about Right here.
After you are finished with your work you might need to make the lines more professional and clean you. Check out these Line Art brushes that are really helpful
Grab a copy of basic Line Art Brushes here

by Artinspireblog | Aug 9, 2014 | Designing, Latest Posts, Photoshop Tutorials, tips & tricks, Tutorials

 I was just asked by a fellow designer who wants to sells printable party invitations through her etsy store and wants to know how to create an editable downloadable printable pdf file that works with invitations and other instant downloads .
I created this simple screencast for her maybe it is of use for someone else out there also looking for a similar solution.
I have used Adobe Acrobat X pro Writer
Let me know if you need help somewhere!
Do you ❤ love ❤ AiVault? Don’t miss another post. Click here to Subscribe to AiVault Blog by Email and receive new updates in your inbox !
by Artinspireblog | Jan 16, 2014 | Photoshop Tutorials, tips & tricks, Tutorials

Keen on finding a way to save some graphic design time ? and batch process some Pngs into JPGs . I am mostly working in Photoshop and i like to keep my images quality closest possible to the original file . For this i use Photoshop Actions to create short cuts to accomplish a job where a batch processing might be required to handle images. (more…)
by Artinspireblog | Jul 6, 2013 | Latest Posts, Photoshop Tutorials, Printing, tips & tricks, Tutorials
How to print business cards at home?
Make sure that your business card is set up in an aligned space within A4 Size sheet that fits your printer. In one single A4 Sheet you can print 8 – 10 Business Card. The Standard Size Business Cards is 3.5″ x 2.0″ . Read on I will explain in detail about how many cards, what type of paper and best practices for printing business cards at home.
I recommend this printer , it works very well for home printing at home and these papers for printing at home .
How can i make business Cards at home?
I often get this question asked whenever I design business card for a small business who are in need of a quick printing of their newly designed business cards. Often the printing companies that offer business card services refuse to print in small quantities. So this leaves you with the question how to print them at home using your own printer.
Sometimes you do not even have a budget to have them printed so below are some of my best tips for printing at home.


1- How to Create a printable pdf file for business cards?
You can design your own business cards in the software of your choice maybe word , powerpoint, Photoshop or Canva . Save it is a high resolution JPG file that you can later embed into a single A4 Sheet in 8-10 numbers.
I prefer to use canva, they already have tons of designs that you can choose from and design your own business cards. You can get Canva for free with 30 days pro account and create and print your cards.
But if this is your own design then you might want to download and use this simple template that I have created. Just place your design within the marked positions and print!
2- How you can save some inks on printing?
You are printing 100 – 300 cards at home , which is a pretty graceful number for starters . Begin by designing a cards that ismaximum three colors .
I printed my business cards at home for the newly set up business of party invites and printable Print Me a Party.
The design was kept simple to give it a crafty feel with just a few colors. Sticking to just the basic colors , i used type writer font for the details of the design .
Few colors means less ink!
![IMG_3639[1]](https://www.aivault.com/wp-content/uploads/2013/07/IMG_36391.jpg)
Looking for a Graphic Designer to Design your professional and impactful business cards ? 👉Lets get connected
PS : Do mention “I am printing at home” so we can design the best option for you.
3-ChooseThe Right Printer Settings
Before you hit a printing command make sure the correct paper is chosen . This also saves some inks.If you are using regular text weight copy paper, do make the following printer adjustments:
Under ”Quality & Media” in Adobe Reader®’s print window, set your printer to ”high” quality & choose “plain
Or
if you are using photo paper thats Matt then under ”Quality & Media” in Adobe Reader®’s print window, set your printer to ”standard” quality & choose “matte photo paper”.
4- Keep it simple
Do not go over board by showing off all your creative skills and designing a very textured and dark design . Keep it simple and think wisely while designing the amount of inks it will call for.
A good designer is the one who can design right product for right circumstances. And there are many designers or ones who do not have enough printing experience , hence resulting in more printing costs for you.
5 – Use textured paper instead
Simplify the design but use a textured paper instead . A simple texture on the paper effects the final result .
6 – Use colored paper.
Experiment with a few prints by printing just a single card on colored papers . Expect to have the final result different as it appears on screen as if you are printing red over yellow it will be printed as orange.
Have you printed at home? What advice you can give ? Any tips of printing that others can benefit from?
Related Article :
by Artinspireblog | Apr 15, 2011 | Photoshop Tutorials, tips & tricks, Tutorials
I often receive this question so that how to convert the photoshop brushes to Paint Shop Pro brushes , though i am Completely a Photoshop person and do not ever use Paint shop Pro , but since most of the users who download brushes from my shop do use Paint shop Pro and ask this question….. here is how it is done
1. Start Paint Shop Pro
2. Go to File -> Open and browse to the folder where the .png files are
3. Paint Shop Pro can not handle brushes bigger than 999px and in older versions 600px you’ll have to go to resize the image to make a copatable brush for this go to Image->Resize the bigger side will be reduced to minimum 999px
4. Go to File->Export->Custom Brush
5. name it , and hit OK
6. In “Edit Paths” make sure you export the brush into your default Paint Shop Pro brush folder.
7. The new brush is available to play around with!
And Voila! Here they are! Your brand new Photoshop Brushes are now in Paint Shop Pro.
The brushes that i offer through my store do come with PNG files to make it easier for you to use either as a digital stamp OR convert it to your own brush set for your software of use.
by Artinspireblog | Nov 15, 2010 | Basic Learning, Brushes, brushes for photoshop, Design, Latest Posts, Photoshop Tutorials, tips & tricks, Tutorials

rounded frames in photoshop tutorial
This tutorial will Show you how to use decorative overlays on your photographs.
Learning level – Beginner
I am using Floral Decorative overlay frames with slightly rounded off edges .(I’m using Adobe Photshop Creative Suite 3 *PSCS4* in this tutorial, but you can achieve this same thing in any Photo Editing program that supports PNG files. i.e. Photoshop Elements, etc.)
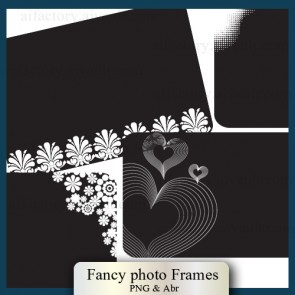
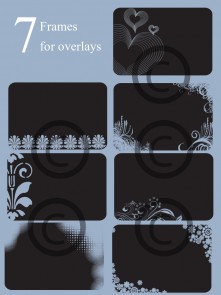
1. Go to: FILE>OPEN> & find your photo.

1. Go to: FILE>OPEN>and open up any of the frames that you would like to use as an overlay , here i browsed and opened up a frame from the calender photoshop brushes set (remember? facebook fans received it for free? still free to download through the store)
When you have opened the png You will see some Grey and white boxes behind around the frames don’t be alarmed since it is a png file this area means it is transparent.
i chose to use this frame go ahead right click and save it to your disk if you want.

3. With your Move Tool, drag & drop your photo ON TOP of the black PNG file. Your Layer Palette will look like this.
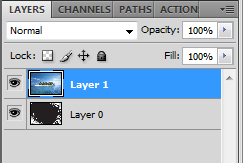 4. Go to: LAYER>CREATE CLIPPING MASK.
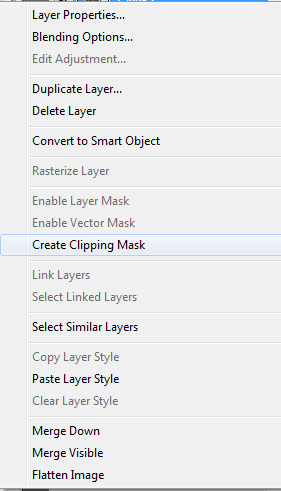 5- And your image will create a clipping mask showing off the image something like this!
 6- Save it as a jpg , post it to your blog or any other project you are doing. you can play more with it further to create some background color for it. but that’s totally upto you!
Here the jpg saved preview

Find out more photoshop brushes , frames and overlays , digital backgrounds , textured papers at the aivault store. Keen on learning more check out more tutorials on this site
by Artinspireblog | Aug 3, 2010 | Basic Learning, Photoshop Tutorials, Tutorials
Frankly speaking i never did explore the power of point , except for creating once in a while backgrounds for presentations for my work . Which in fact is fun and quite rewarding . But using it as a drawing tool? never quite thought of it until Tom Kuhlmann created a similar power point tutorial version of one of my previously written tutorial How to create an envelope icon with a satin Feel

This is how my version’s outcome looked like and below is Tom’s Version created entirely in PowerPoint

Tom also shares a video and step by step tutorial on his site Go take a look![/private]
by Artinspireblog | Aug 27, 2009 | Creative Findings, Photoshop Tutorials, tips & tricks
[private]I just got this in Design Tip in my mailbox which i couldn’t wait to share!.AND why on earth i have not been using Indesign! (more…)
by Artinspireblog | Jul 15, 2009 | Photoshop Tutorials, Tutorials
This post is a sequential posts for digital watercolorists! please register to access this post or get details here! if you have already registered to this course please login .Or Join The fun at the forum. (more…)
by Artinspireblog | Jun 15, 2008 | Effects, Photoshop Tutorials, tips & tricks, Tutorials
[private]
After recieving many requests of how to create floral brushes in photoshop here is a tutorial , this tutorial has a source psd file with all the shapes in layers as wellas a brushes file which we will be creating by the end of the tutorial. (more…)


![IMG_3639[1]](https://www.aivault.com/wp-content/uploads/2013/07/IMG_36391.jpg)


