Vector illustrations are known to be rather popular in web graphics today. Professional designers are able to create such illustrations in a matter of couple hours. (more…)
This tutorial will serve as an introduction to creating a mosaic like effect inside illustrator , end result possibilities are endless But here is the Basic technique of creating a mosaic effect.
[private]This is an introductory post and will continue in several sections Through thise post i would like to establish a series of post with introduction to the tools palette and illustrator workspace. A better knowledge and understanding of illustrator. (more…)
Gradient Mesh tools are used to create a single multicolored object on which colors can flow in different directions , the color transitions achieved are smooth running from one color to another. (more…)
I used to think that how on earth designers make so intricate flower designs and invitations . UNTIL! I found the answer ” they used vector brushes!! ” the answer was vector brushes illustrator
There had been a trend of creating flourish which started around 2008 , that was when I started playing around with illustrator brushes and created many of them. Including the one that I am going to share with you here. Previously I have shared Free illustrator brushes with you but today I wanted to share with you how I actually create floral designs .
So what is my secret tool?
Vector brushes for illustrator
I have created a set of floral brushes for illustrator for my own ease of use and these had been greatly helpful in creating many designs . They have helped me create so many versions of floral branches and creating wedding invitations and more.
Want to see this vector brushes set in action?
Interested? you can get these floral brushes from my store right here.
There are plenty of soft-wares available to create vector illustrations.And there are more than plenty techniques to achieve your required result. It all depends on how you achieve it and in the end which software and the plan of work best suits you.
[private]It has been a while since I posted any Tips & Tricks of using illustrator OR Vector as your medium . Here are some very useful tips I would like to share with you and personally would recommend sticking to them.(more…)
In this tutorial you will see how to use envelope tool to create a Disco Ball , You will also utilize Twirl and Crystallize tool to understand its options . This tutorial is divided in two parts . During Part 1 you will be using Envelope tool & Crystallize Tool.Part 2 will walk you through Twirl Tool options. This tutorial is continued from Part 1 (more…)
In this tutorial you will see how to use envelope tool to create a Disco Ball , You will also utilize Twirl and Crystallize tool to understand its options . This tutorial is divided in two parts . During Part 1 you will be using Envelope tool & Crystallize Tool.Part 2 will walk you through Twirl Tool options. (more…)
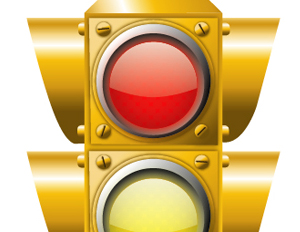
just came across this tutorial from Vector Tuts . In this tutorial, we’ll see how creating this detailed traffic light is just a matter of building up layers of simple shapes, custom gradients, and the Outer Glow effect.
In this tutorial i will show you how to set up an illustrator document for working in illustrator to work better in flash. I will also tell you how to create an animation IN illustrator FOR flash. (more…)
After recieving many requests of how to create floral brushes in photoshop here is a tutorial , this tutorial has a source psd file with all the shapes in layers as wellas a brushes file which we will be creating by the end of the tutorial. (more…)
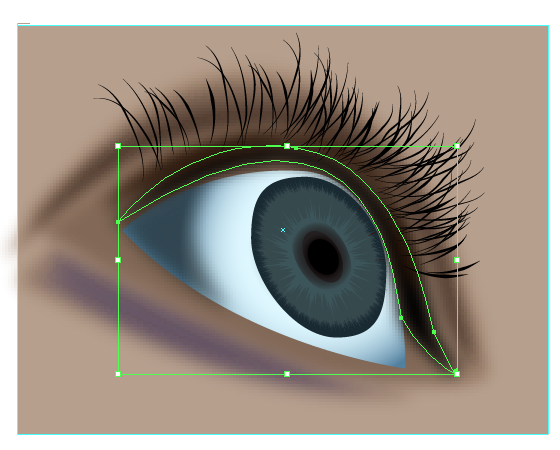
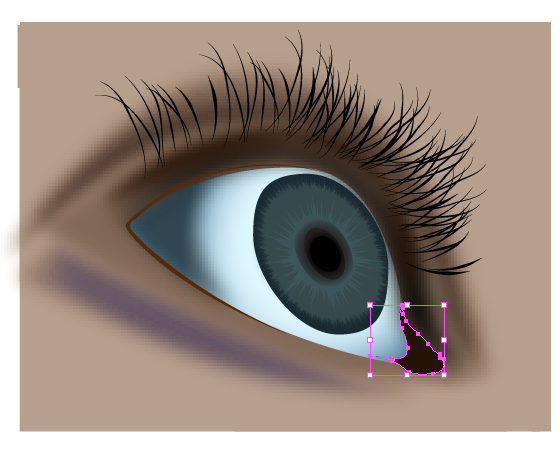
Create a copy of the white area of the eye. Using the knife tool cut out the copy of the white area as seen below.
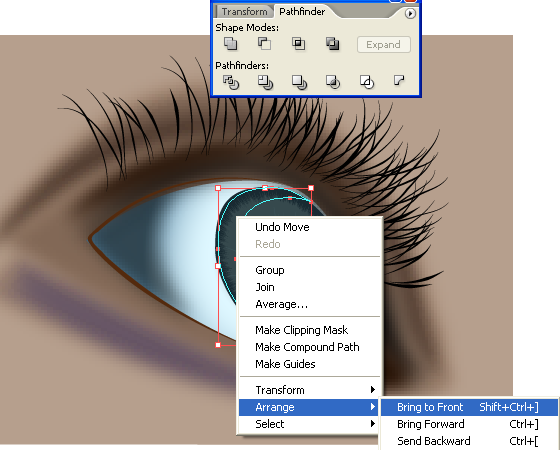
Place the cut out over the white area , arange it to be at the front . ie right click > arrange > bring to front.
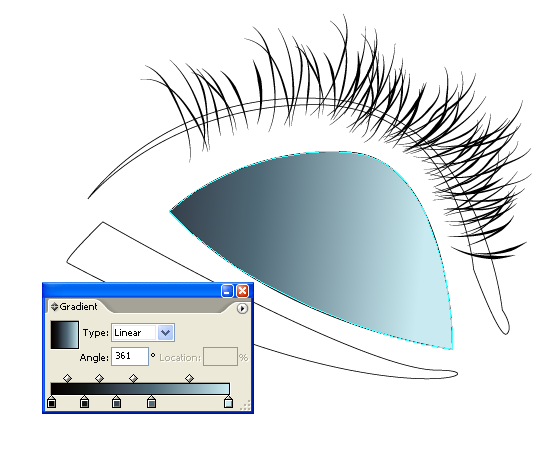
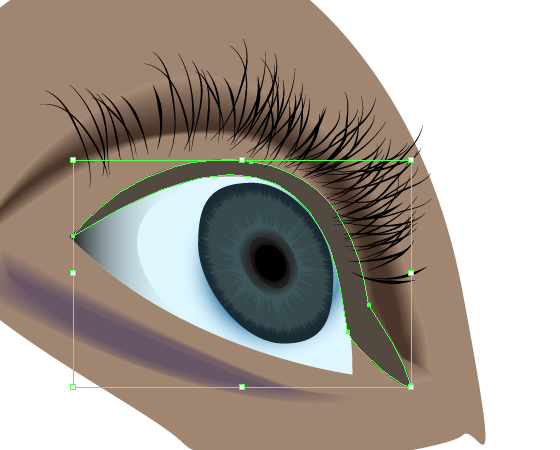
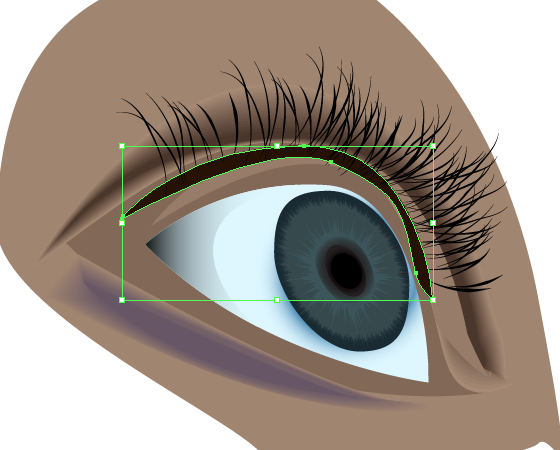
Now create a shape as seen , this will be our eye lid. Create two shapes one inside the big one select both of them , and shade the bigger one a lighter tone than the smaller one.
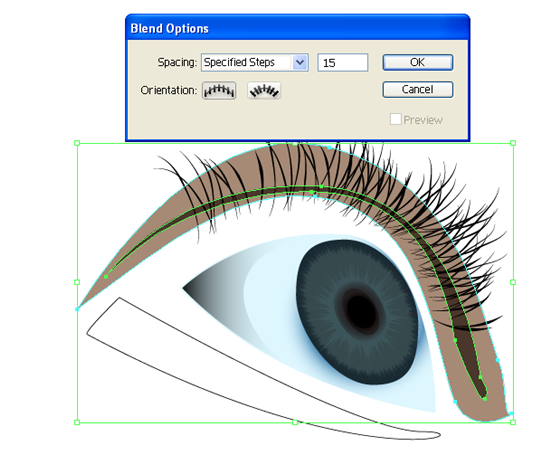
Use the blending options in order to apply gradient to the eye lid .
ie Object> Blend> Blend options , Work through specified steps which again will depend of your working drawing size . here is what i chose.
Make the blend as seen below.
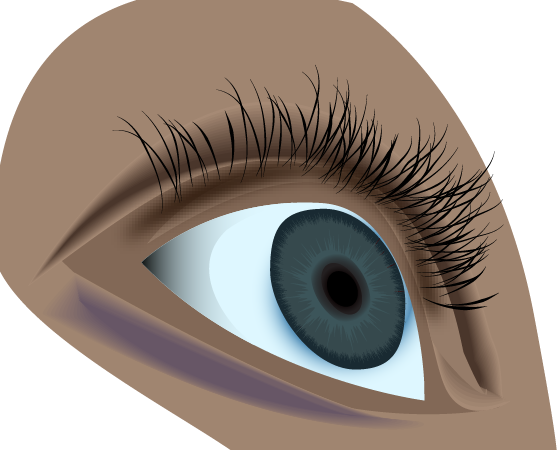
The result is ….
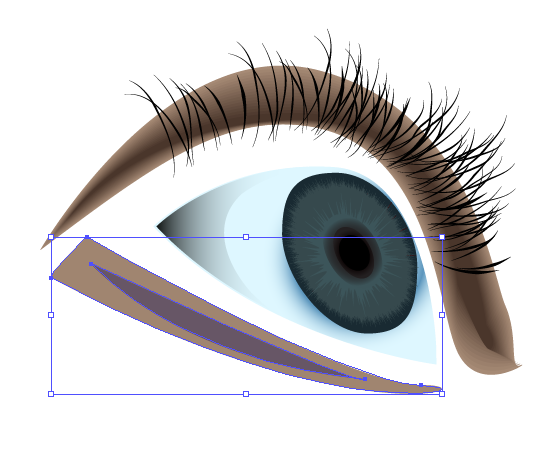
Now we will repeat the same with the lower shade under the eye.
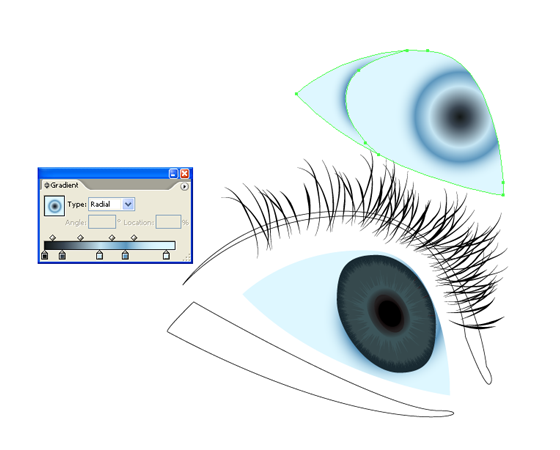
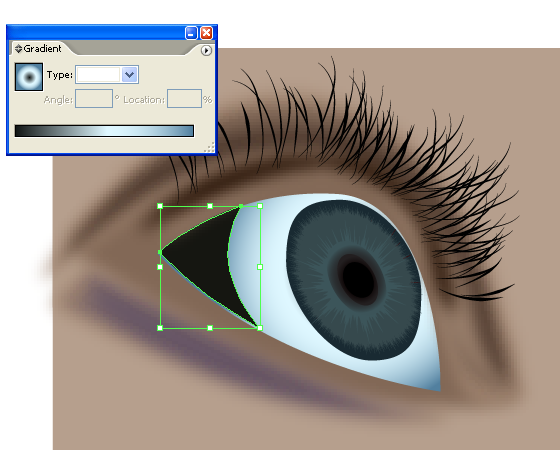
here we will work on the deep area of the eye , inner one.create the shape
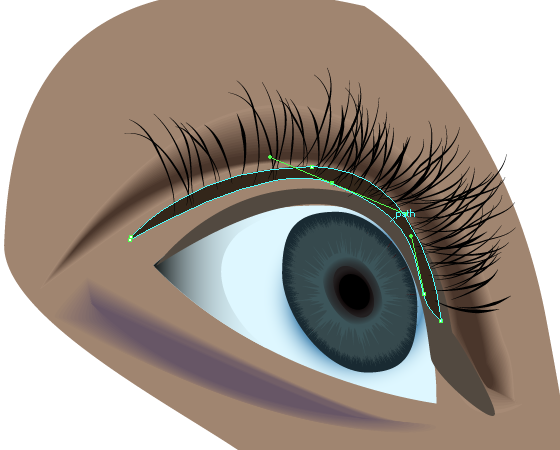
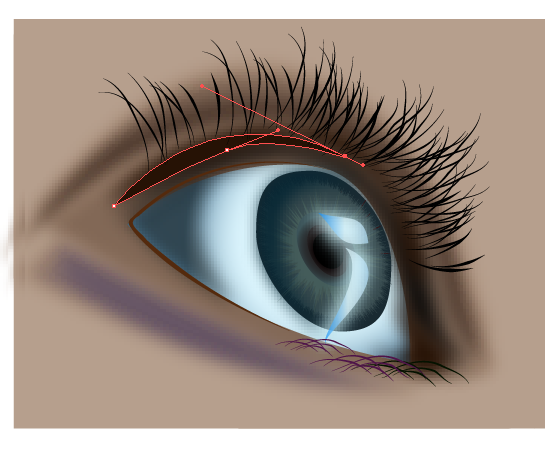
Create an inner shape as well adjusting the paths to get your desired result. This will be our Hair Growth area of the eye..
Place it quite aligned to the hair placement.
Use Effects> Guassian blur.
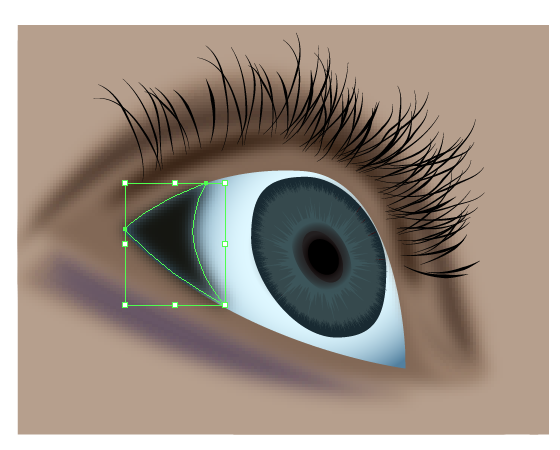
select the smaller cutout of the white area.
Using Effects > guassian Blur blur it a bit.
Lower the transparency of the said cutout.
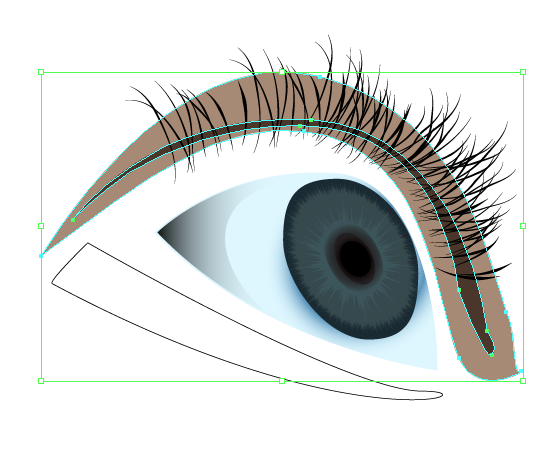
Select the shape above the eye and use guassian blur to blur it a bit.
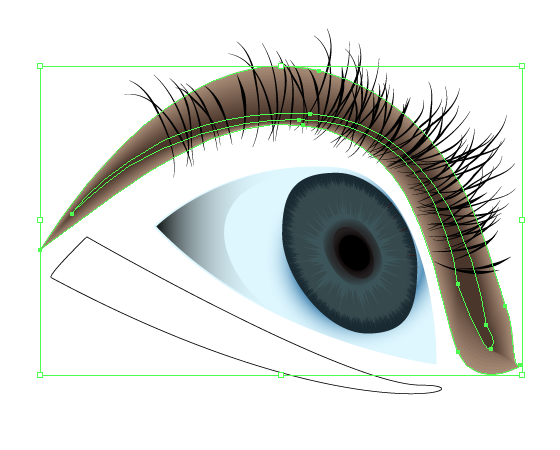
Create a shape as seen at the inner corner of the eye , note here i have using a stroke line to deepen the left side of the eye giving it a finished effect covering where skin meets the eye.
Create a copy of the large circle of the Pupil Use another copy arrange them and use path finder to cutout a crecent shape.
Place this shape over the left side of the pupil above your Crystallized pupil are , here you can see the arrangement of the areas of the eye watching this small swf preview.
Colour this crecent a darker tone
Use guassian Blur to blur that crecent part as well.
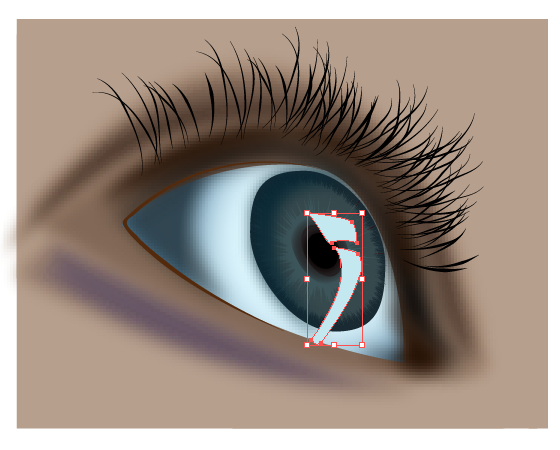
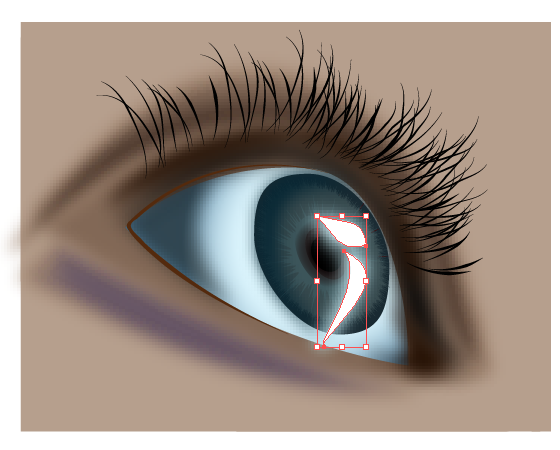
Placing some shine in the pupil area. Create a shape as follows.
Save a copy of it
Blur this shape as well .
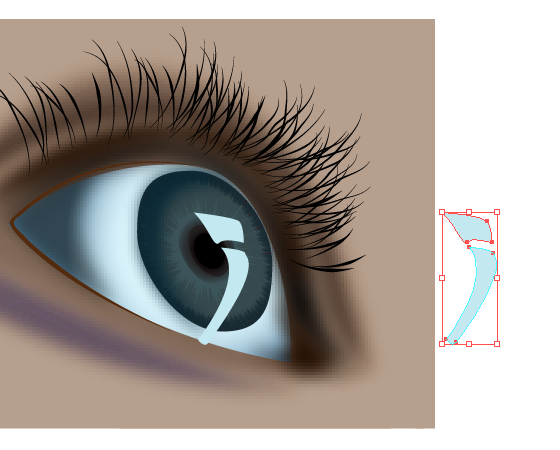
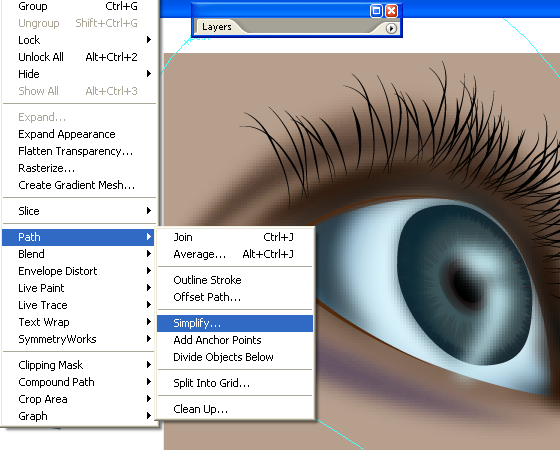
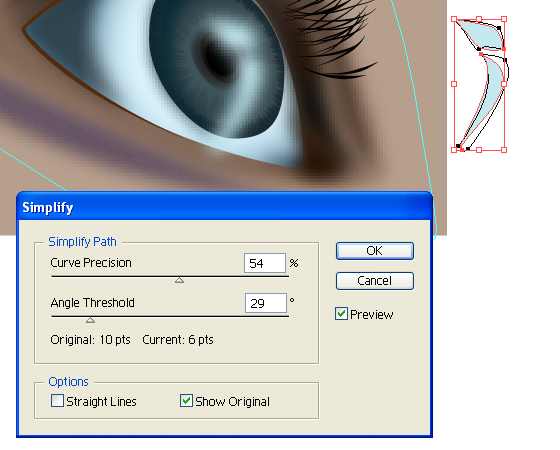
Select the saved copy of the shine shape . and go to object> path > simplify
Work on it to get a little simplified and a smaller shape than the original one .Something like this.
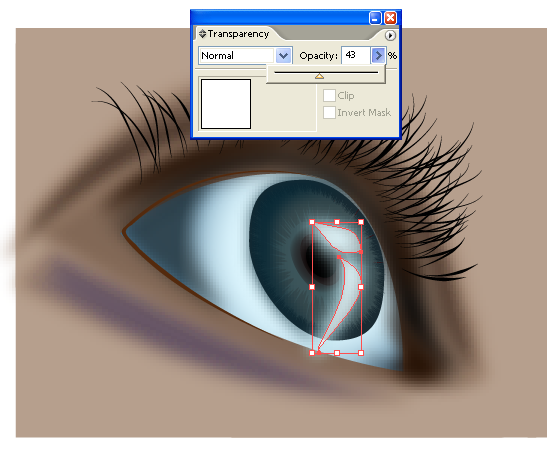
Place this over the top of the gradient shine shape
Reduce the opacity of the shine.
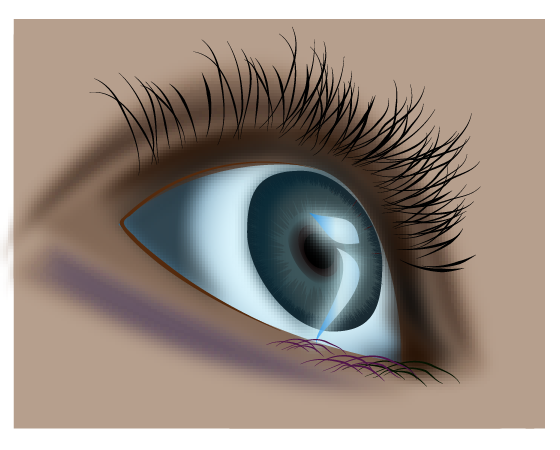
I here gave a little bit of gradient to the shine part..
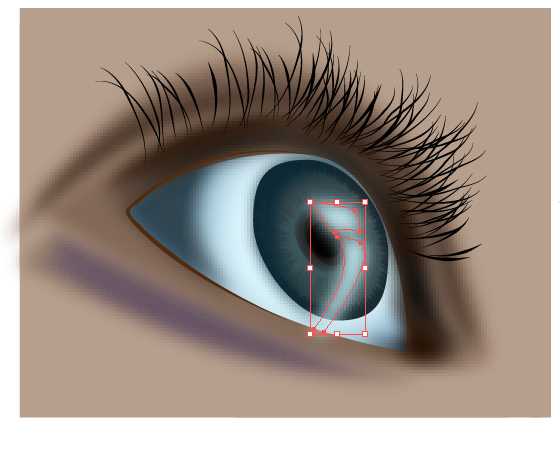
Feeling that left part of the eye needs more depth at this point since i am clearing and defining the areas. I drew another shape. For some of you out there these shapes are NOT perfect ones , This is what i am keeping it intentionally . i believe thing is original if it has a few flaws many wont agree with me here . but…. you are welcome to draw perfect shapes … i dont want the work to be too technical 🙂
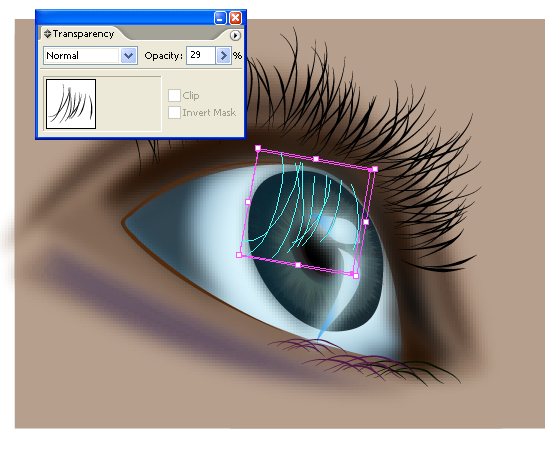
Since the eye is a shining one it will be reflecting the eyelashes so i dragged out another symbol of hair from the symbols pallette . and dropped , inverted , reflected it .and reduced the transparency of it.
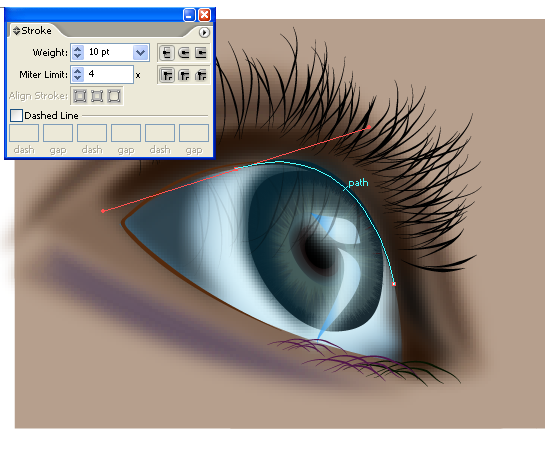
Draw another stroke over the pupil area.
I have used the Line Art Brushes through out the strokes of the drawing ie , hair and lines. Those of you who dont have it already can download it from here.
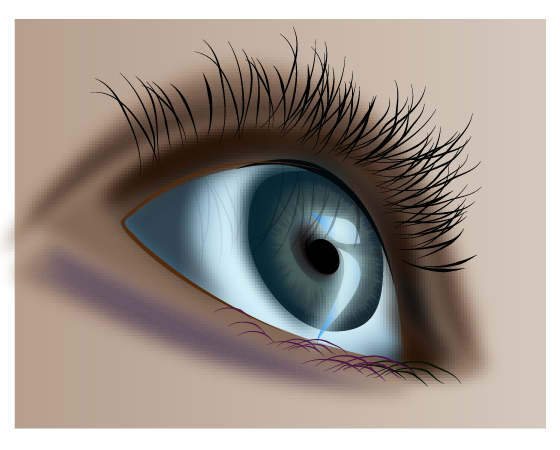
Create another small highlighted shape on the inner corner of the eye giving it a lighter shade and then use guassian blur to blur it a bit. here is our finished eye.
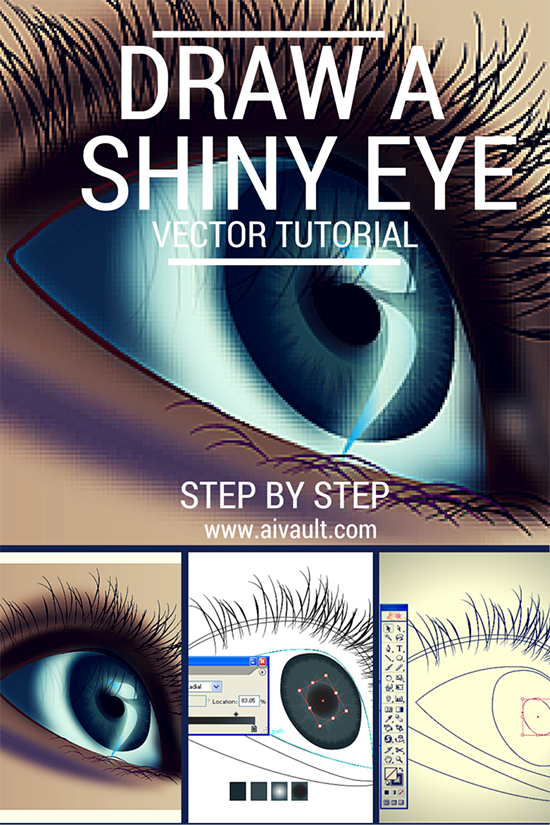
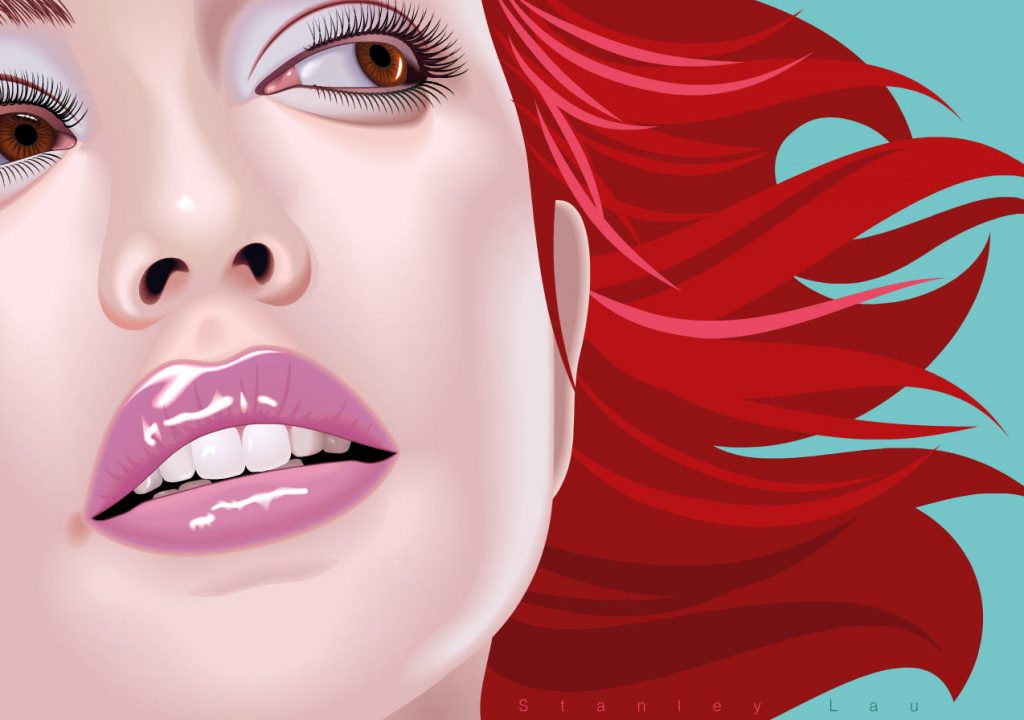
Conclusion : we have used line art brushes to draw our basice drawing , used symbols of hair growth to create eye lashes . Used knife tool , gradient , pathfinder , strokes and crystallizing option to create the eye as seen . This is the second tutorial in creating portraits . Previous tutorial in the same series in Creating lips if you have missed it you can check it out here.!
subscribe to Our Rss feed to get the next part in your inbox !
Source file of this tutorial is currently not available
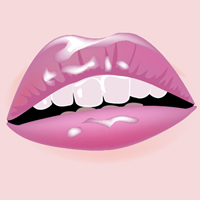
This tutorial will show you how to create an expressive eye as part of a portrait , This is a follow up tutorial of How to create lips using mesh tool ….
The tutorial will be in two parts , in the first part i will explain how to create the eye drawing and then creating the pupil ….We will start by drawing out an eye in outline using the pen tool . Since i will be more concentrating on other tools rather than pen tool i am begining by understanding that you have basic knowledge of pen tool .
So in step one we will draw some basic out line of the eye , this is our drawing that we will be following throughout the tutorial .
Next we will create a bunch of hair growth using the pencil tool .this is freehand drawing of a few lines and then smooth them out using the smooth tool this is the result
Which we will save as a symbol .
Create and copy an oval shape as seen below
Fill it up with a dark shade
we will use the crystalize tool in order to distort the pupil shape. This tool is found as seen above in your tool pallette. Double click it to open up the dialogue box. And adjust options as seen which might vary depending on your drawing size . So try to follow the preview of the result.
Here is what i got after crystalizing my silightly oval shape , dont forget to keep a copy of the original shape.
Resize it as seen here
Select the big circle of the pupil make a copy of it and follow the crystallizing options for the same as well.
Here is what i got
Arrange your shapes
Place the Crystallized pupil over the original one. This is for the bigger one.
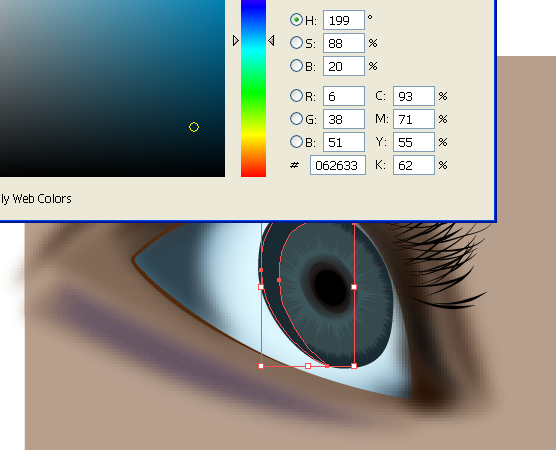
and similarly for the second ones. Here is a pallette of colours that i am using to create the shades of the pupil you can click on these boxes to pick out the colour values if you like. Shade the appropriate shapes accordingly . The darkest shade goes inside the eye.
Create a copy of the darkest shade ie smallest circle and apply gradients as seen
Place the original circle on top of it. Apply a dark gradient to it.
Now we will work on the white area of the eye and below you will see the shades i will be using as the reference
A couple of months back i gave myself a challenge of creating 100 illustrations in 20days time creating around 5 illustrations perday . The purpose of these speed illustrations was to refine my skills and learn more alongside creating illustrations for stock agencies. It was such fun and i will suggest speed illustrations concept to anyone and everyone who is looking to refine their hand at illustrator ..
[private]It seems that illustrator is full of new tools and various elements and more i dig into it more i learn . And it seems every time one more hidden tool is revealed .. Have you heard of envelopes . It seems to be a sister tool of mesh tool . Here is a little bit intro into this so practical tool!!]
Reching the end of finalization of your artwork One challenge is saving the file with less size. Here is a little tip which you can follow to get less of messy stuff in your final outcome of illustrations. File will be saved with less pallette items hence smaller file size. (more…)
My latest exploration is the mesh tool and i am so much loving it! If you havent already tried it just give it a go , Start by creating a circle or box select the mest tool click anywhere on your circle choosing a darker or lighter shade there you have it another exciting new world of using shades and gradience where you have total control of shading…
Isnt it annoying when you are working with multiple files the thumbnails are not viewable , and if not named properly you have to go through opening files and seeking the one you are looking for yes it is for me . As when i am working i need to access files faster although i try to manage them under rightly named folders
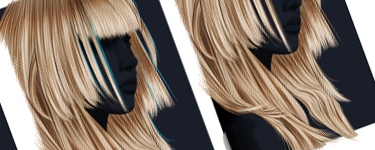
Just came across this wonderful tutorial on vectorizing hair . I have been doing Vector portraits for my friends and they loved it but after this tutorial i am sure they are going to adore them. Just follow the tutorial the level is expert so you might want to go back to illustrator help to get understanding of a few options .
Do you know that you can scale patterns swatches by using smart scale?just click on the scale tool twice to open up the dialogue box , now you can adjust the pattern display and size accordingly , Select uniform scale or non uniform and you can scale either your object or the pattern inside it. (more…)
Every next Website has a 100% money back guarentee icon ,Creating one of your own is more fun when you have total control over all the elements of it In this tutorial my aim is not only on showing you how to create the icon but you will also practice and experience few of the tools of illustrator and some ways you use for your creative purposes.
[private]Most of you probabally already know about what brushes are , But for those of you who dont know illustrator provides a prest brush set along with the software. Which gives life to your work. There are plenty of brushes available throughout the net which can aid to your creative work.
To install brushes for Windows/Mac :-
Unzip the file and drag and drop the files in the following folders
programme files / adobe / adobe illustrator / Presets / Brushes
We have tried and tested these brushes for both Windows and Mac if you install them correctly they will work .
What you can do with them?
Create unlimited artworks use them again and again , draw a curve or line and click the brush you would like to use . Make sure your file is set to scale strokes and effects .
Edit> Prefrences > General
When you are done creating select your complete artwork and expand the appearence .[/private]
Here is a simple tutorial which will show you how to give grunge effect to your text in illustrator , the beauty of using the technique is that you get a text that can be scaled to any size without loosing its clearity . Also you will always have crisp clear edges . (more…)
[private]Ok on request here is how you achieve a half tone effect here only i used the shape of a circle . if you want it around a specific shape you must copy the outline of that shape and repeat the same then increase the size of the same shape , with reversal of colors you can get different effect
enjoy! lemme know if it was helpful
[private]The world is going crazy i mean so much and so many of those flowery florishes are seen everywhere . Here is a simple tutorial on how to make one of your own 🙂
")
 Drawing Vector-looking Cat Illustration Using Photoshop
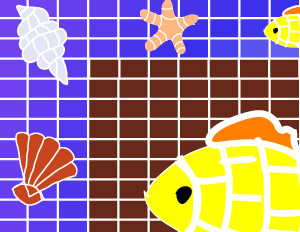 This tutorial will serve as an introduction to creating a mosaic like effect inside illustrator , end result possibilities are endless But here is the Basic technique of creating a mosaic effect.
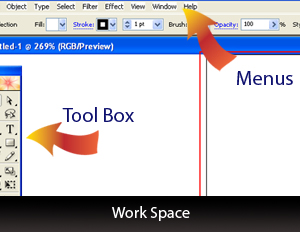 Starting with illustrator , When you open up the illustrator you are greeted by some boxes and palettes .


 It seems that illustrator is full of new tools and various elements and more i dig into it more i learn . And it seems every time one more hidden tool is revealed .. Have you heard of envelopes . It seems to be a sister tool of mesh tool . Here is a little bit intro into this so practical tool!!]


